Your stock is on its way. Eight pallets full of purple widgets of varying sizes should land in your online warehouse in the next few days. You nabbed them at a price so ridiculous you practically stole them from the supplier, but how are you going to get them back out the door as quick as they came in and make a tidy profit along the way? Digital Marketing!
If you build it, they will come
There are 6 centillion ways we could market these purple widgets, but today we are going to run through creating a campaign page online to show these shiny new products at a great price, which can then be promoted through any desired medium, like the homepage, social, email or AdWords.
What should be on my campaign page?
Our example page is going to highlight how fantastic these purple widgets are, highlight the savings off the regular price and create a sense of urgency. We are going to achieve this using a few methods:
- A hero banner image at the top of the page to set the scene and detail the offer at a high level (e.g. 30% off Purple Widgets until 7pm!)
- This could also include details of a promotion code to receive the discount
- Some text below this banner providing further details around the product and why people should be interested
- Display the products in a Campaign Grid so customers can see the price and availability
- Use the Product Ribbons feature to show a “Sale” or “Clearance” ribbon against the products in the Campaign Grid
- Further details under the Campaign Grid highlighting features, benefits or differences between the various purple widgets on offer
- If your widgets have different features and price points, it’s wise to provide simple clarity to your customers and guide them down the right path
- Offer a Subscription area for customers to sign up to hear about future promotions. E.g. “Sign up to our newsletter to receive alerts about our clearance sales before anyone else!"
Sounds good - How do I create a page?
Jump into your CMS and navigate to Content -> Custom Pages.
Hit the “Add Page” button up the top right and fill out some basics for your page. ![]()
I've added it for my Public and B2B (CSSUser) customers.
Some notes about some of the fields I've used there:
1) This is the Meta Description used for SEO. It's the text that appears here on Google:
It should be a brief explanation of the page and also entice Customers to click on the link. Keep it under 155 characters or Google will chop you off mid-sentence.
2) This is the Page Title Tag and it shows here in Google:
This is a shorter explanation of your page and also used to entice. Try to get it around 55 characters... but sometimes you can fit up to 60 or more depending on the characters you use (a lower case I is quite skinny yet an M is pretty fat) so experiment with lengths!
3) The Hidden flag allows you to add a page to your website without displaying a link in one of your menus. This is particularly useful for pages that you're going to be distributing via other channels like email or featuring on your homepage without cluttering up existing menus.
Select the "Widget Based" tab at the bottom of the page then hit Save & Exit
INFO - Simple pages allow you to create a page with just text and images, like you would write an email, which is perfect for things like a Privacy or Shipping Policy. The Widget Based page allows us to add all of the great in-built widgets to our page - like Campaigns, Banners, Articles - anything really!
Let's pick a layout
The first thing we need to do now that we've got our shiny new blank page, is set up the layout to suit our content. The CMS contains a lot of pre-made layouts you can pick, with the ability to create custom layouts coming very soon (expect an email from us in the next few weeks).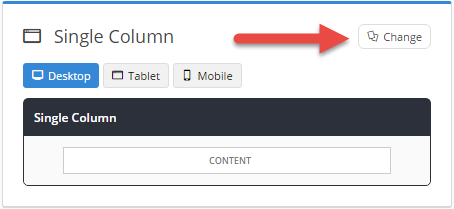
On the next page select the layout you want to use and hit Save.
Now I add the Banner right?
You sure do! Find the zone you want to add it to, which in my case is the Title Zone, then click Add Widget
Then you can search and find the widget you're looking for and click Add Widget. The widget is then placed in the zone and is ready to Edit.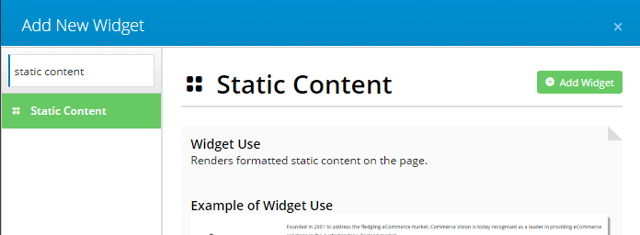
Because we're going to add a Static Banner... I'm just going to use the Static Content widget and place an image in it.
Click Edit
Then Click the "Insert Image" button to add an image.
Time to add some text
I'm going to use the Static Content widget again and place some bullet points in the zones below my horrible 20 second banner. I end up with something that looks like this: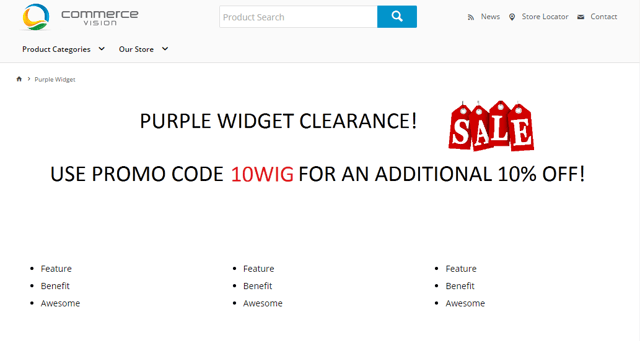
This is what my CMS looks like currently: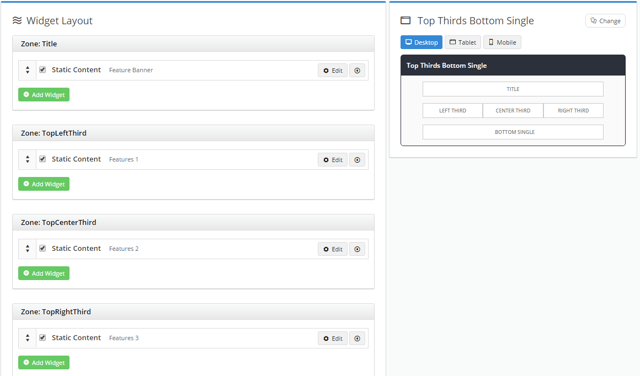
Campaigns!
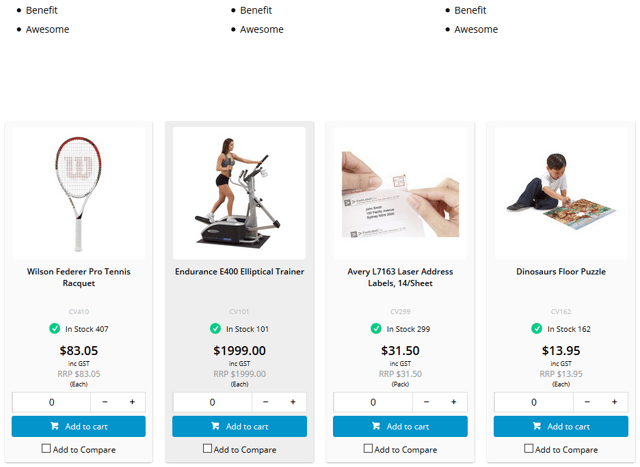
Now we need to list the products we've got on sale. I'll add a Campaign widget to the page and point it to a campaign. For a guide on how to create a list of Campaign products check this page on CVConnect: http://cvconnect.commercevision.com.au/display/KB/Product+Campaigns
Once configured, we end up with our products on the page!
Ribbons? Please Explain.
BPD has the capability to add a "ribbon" against a product that indicates something special about it. This might be that the product is on Sale or Contract or New.
In the Product Maintenance page in the CMS you can add a ribbon to a product and specify the end date. Because my promotion is going to end tomorrow, I'll set up the end date for then and the system will automatically remove the ribbon for me.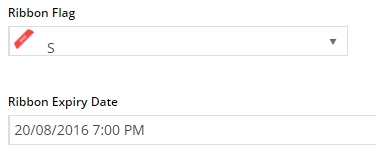
So now our products look like this!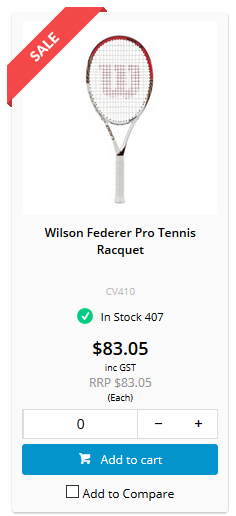
Additional Product Features or Comparisons
Below the products you can add some more information about your products or promotion to either entice the customer or remove any of the barriers that may prevent them from converting.
Mailchimp Subscribe
Having a good sale is a great opportunity to collect details from your potential customers and get in touch with them when future sales occur. Try adding an element of exclusivity to it.
BPD has a Newsletter widget which integrates to Mailchimp to automatically populate your list when someone subscribes.
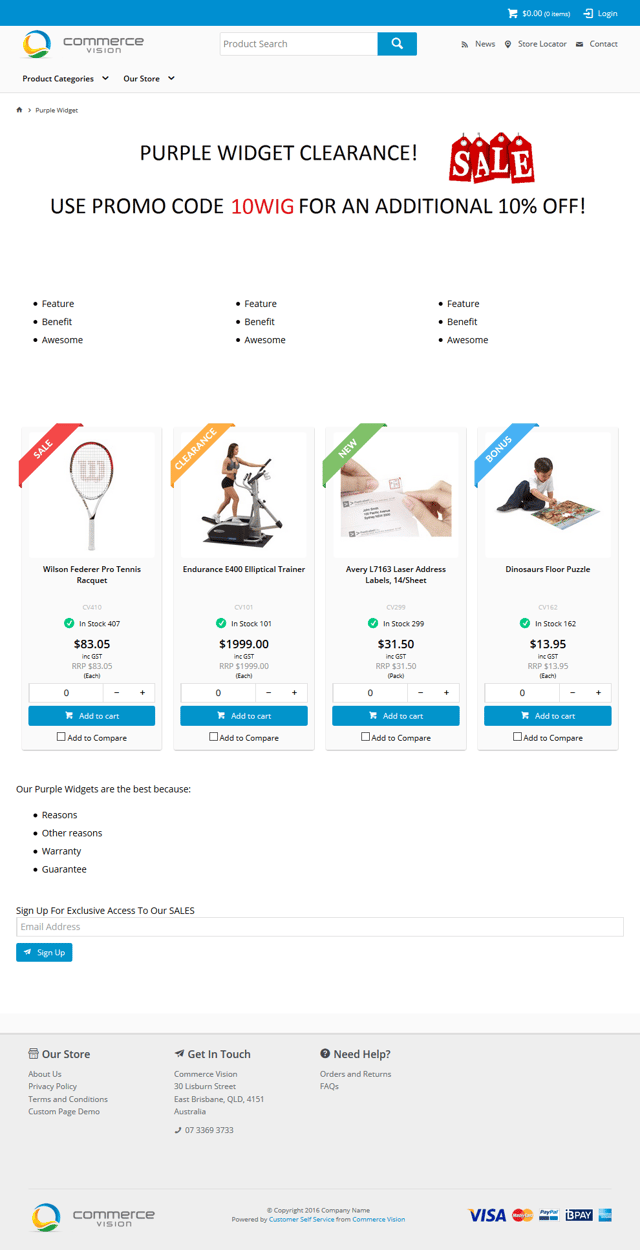
After we add all these things, we end up with a page that looks something like this:
My promotion ended - Now what?
Because your ribbons will automatically expire and your promotion code would have been set with an end date you don't need to do anything, but the page could be updated to show things like:
- A message indicating the sale is over but link customers to the Purple Widget category and offer a Newsletter sign up for notification to future sales
- Automatically redirect customers to the Purple Widget category (see article here to setup redirect: http://cvconnect.commercevision.com.au/display/KB/301+Page+Redirects)
- Link to a current Sale page or even automatically redirect there
Next Steps
So now you know how we have setup a landing page it's over to you to give it a try. The one thing that we have learned over the years about Digital Marketing is: don’t be afraid of experimentation. The system is designed to be used and you’ll find that your proficiency grows over time.
The other great thing with the capabilities is that you can be very targeted in your campaigns, even down to the audience, and you can build these to run at different times of year to support your business. Some great examples are end of financial year, overstocked, new arrivals and exclusive product lines.
I look forward to hearing how you get on.
